How to Assemble a Model Train Layout
 If you are a beginner before you get started on your Model Railway Layout there are a few things you need to know.
Things you’ll need:
- Model Train Tracks
- Plywood Sheets
- Straight Pins
- Straight Pins
- Paper Towels
- Paper Towels
- Carpenter’s Glue
- Paper towels
Step 1
There are three things you need to decide on –
- Scale – Depending on the amount of space you have may determine the scale you use. HO scale is the most popular.
- Theme – Where are your trains coming from and going to? (a timber yard, a port etc.). What location and era will determine the type of trains you will be running?
- Display – Are you building the train layout for your self or will it be part of a bigger display?
Step 2
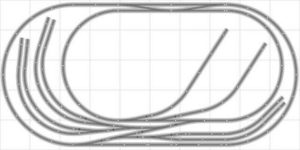
Decide how you are going to layout your tracks. Prototype tracks are the easiest way as you use detailed satellite photos using Google Earth
Step 3
Test your tentative layout to ensure that you have enough tracks and couplers for your design by placing the tracks end to end without attaching them.
Step 4
Layout the tracks on the floor beside the area you’re building them on to make sure you get each piece installed in order.
Step 5
Decide whether you are going to glue or pin down the tracks. Glue is more stable but less authentic.
Step 6
Clip the first section of the track to the second. Depending on the type of train set, the tracks will either be laid end to end (flush at the ends) or will slide into each other with small grooves and tabs.
Step 8
Continue attaching sections of the track until the route is complete. Wait overnight for the glue to set, or pull the tracks slightly to make sure pins (like real rail spikes) are secure.